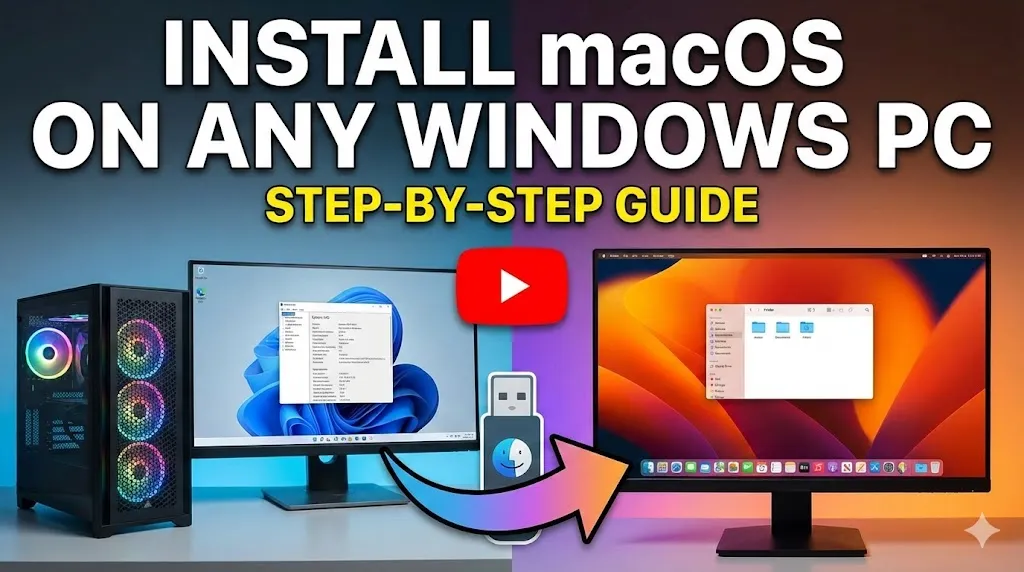
How to Install macOS on a Windows PC
Want the smooth experience of a Mac without the $1,000 price tag? Learn how to safely install macOS alongside Windows on your PC with this step-by-step OpenCore guide.
Breaking the Walled Garden: How I Installed macOS "Tahoe" on a Custom Windows PC
The allure of macOS is undeniable. It is renowned for its stability, smooth user interface, and seamless ecosystem. However, the barrier to entry is high; a base model MacBook or iMac commands a premium price tag—often starting at $1,000—that many enthusiasts simply cannot justify.
But what if you could have the best of both worlds? What if you could run Apple’s latest operating system on the powerful, cost-effective PC hardware you already own?
This guide details the 8-hour journey into the world of "Hackintoshing." We will explore how to bypass Apple’s hardware checks, build a custom EFI, and successfully dual-boot macOS "Tahoe" (the latest build) alongside Windows.
⚠️ Disclaimer and Prerequisites
Warning: Installing macOS on non-Apple hardware violates Apple's EULA. This process is complex and carries the risk of data loss. Always back up your data before proceeding.
The Vocabulary of the Hackintosh
Before diving into the installation, we must define the tools that bridge the gap between PC hardware and Apple software.
1. Building the EFI with OpenCore Simplify
The most daunting part of a Hackintosh is creating the EFI manually. One wrong value in the configuration can prevent the system from booting. To mitigate this, I utilized a tool called OpenCore Simplify.
Step 1: Hardware Scan
Upon launching OpenCore Simplify, the command-line interface (CLI) prompted a hardware scan. The tool automatically detected the CPU, GPU, and motherboard chipset.
Crucially, it compared my components against Apple’s compatibility list.
CPU: Compatible
GPU: Compatible
Verdict: Ready for macOS "Tahoe" (The latest version).
Step 2: Kext and Audio Selection
The tool’s automation shines here. Instead of manually hunting for kexts, OpenCore Simplify auto-selected the necessary drivers based on the hardware scan.
It also prompted for the Audio Codec Layout.
Why this matters: Mac motherboards use specific audio hardware. PC motherboards vary wildly.
The Fix: I selected the "God Layout" suggested by the tool, which serves as a catch-all configuration for most modern audio chipsets.
Result: A fully generated EFI folder containing the OC (OpenCore) directory, drivers, and the initial config.plist.
2. The USB Mapping Challenge
Apple’s hardware uses a strict USB architecture. If you simply plug a macOS installer USB into a PC, the Mac kernel likely won't even "see" the drive. We must "map" the ports using USB Toolbox.
The Process
Download USB Toolbox: A utility found on GitHub.
Port Discovery: With the bootable USB plugged in, the tool scans all ports (USB 2.0, 3.0, Type-C).
Identification: I identified the specific port my installer was using.
Export Kext: The tool generated a file named
UTBMap.kext.
The Integration
I copied UTBMap.kext and the base driver USBToolbox.kext into my EFI folder. However, simply having the files isn't enough; OpenCore needs to be told to load them.
Tool Used: OC Auxiliary Tools (OCAT)
Purpose: A GUI for editing the
config.plistwithout dealing with raw code.Action: navigated to the Kernel section and added entries for both USB kexts.
3. Acquiring the OS and Creating the Installer
With the "Bridge" (EFI) built, I needed the "Destination" (The Operating System).
Retrieving macOS Tahoe
I used the MacRecovery script included in the OpenCore package. This Python-based tool downloads recovery images directly from Apple's servers.
The Glitch: The documentation had codes for Sonoma, Ventura, and Monterey, but "Tahoe" was missing.
The Fix: A deep dive into the GitHub repository revealed a
recovery_urls.txtfile. I found the specific code for Tahoe, executed the command, and downloaded theBaseSystem.dmg(approx. 700MB).
Formatting with Rufus
To burn the image to the USB drive, I used Rufus on Windows.
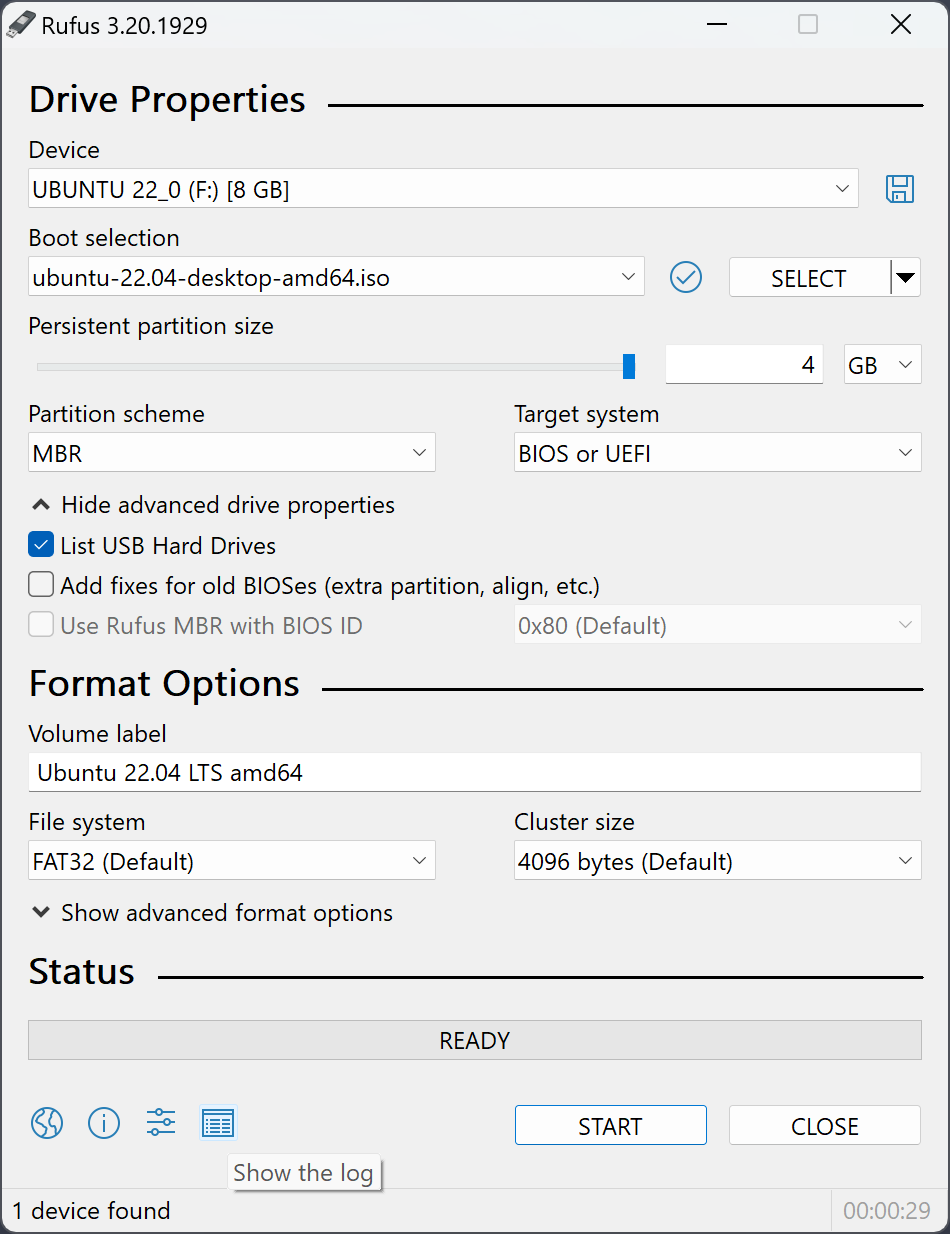
Critical Settings:
Partition Scheme: GPT (GUID Partition Table)
File System: FAT32 (Required for the EFI partition to be readable).
Once formatted, I manually copied two essential items to the root of the USB drive:
The EFI Folder created in Phase 1.
The com.apple.recovery.boot folder (The OS image).
Phase 4: BIOS Configuration
Before the PC can accept the new OS, the motherboard BIOS must be prepped. PC BIOS settings often conflict with macOS requirements.
The Checklist:
Secure Boot: [DISABLED] – macOS keys are not in the Windows Secure Boot database.
Resizable BAR / Smart Access Memory: [DISABLED] – This GPU feature causes boot hangs on Hackintoshes.
Boot Order: Set USB Drive to Priority #1.
Phase 5: The Installation (The Moment of Truth)
I inserted the USB, saved the BIOS settings, and rebooted.
The Verbose Boot
Instead of the Windows loading circle, I was greeted by lines of rapid-scrolling white text on a black screen.
Note: In the Hackintosh community, this text is a good sign. It means the kernel is loading. If it freezes, the text tells you exactly where the error lies.
Suddenly, the code stopped, the screen cleared, and the white Apple logo appeared.
Disk Utility & Installation
Language Selection: English.
Disk Formatting:
Opened Disk Utility.
Selected the spare SSD.
Clicked Erase (Format: APFS, Scheme: GUID).
Install macOS: clicked "Install macOS Tahoe" and selected the newly formatted drive.
The system estimated 3 hours, but after several reboots (and a few heart-stopping black screens), the process completed in about 40 minutes.
Phase 6: Post-Installation & Independence
I was staring at the macOS desktop. The animations were fluid, the colors were crisp. However, the system was still reliant on the USB stick to boot. If I removed the stick, the PC would default back to Windows.
Moving the EFI
To make the installation permanent, I needed to move the EFI folder from the USB stick to the hard drive's hidden partition.
Download OCAT for Mac: Since I was now inside macOS, I downloaded the Mac version of OC Auxiliary Tools.
Mount ESP: I used the tool to mount the EFI System Partition of the internal SSD.
The Transfer: I copied the
EFIfolder from the USB drive and pasted it into the SSD's EFI partition.
Conclusion: Is It Worth It?
After unmounting the USB and rebooting, the computer offered a boot menu: Windows or macOS.
I selected macOS. It booted instantly.
The Verdict
The system is stable. Hardware acceleration works, the interface is incredibly smooth, and to the naked eye, this is indistinguishable from a Mac Pro or high-end iMac.
Pros:
Cost: $0 (assuming you own the hardware).
Performance: Higher than similarly priced real Macs (due to desktop-class cooling and power).
Flexibility: Dual-booting allows for gaming on Windows and productivity on macOS.
Cons:
Time: The 8-hour setup process.
Maintenance: OS updates can break the EFI, requiring maintenance.
For those willing to brave the command lines and GitHub repositories, the Hackintosh remains the ultimate PC enthusiast project. I have successfully tricked my computer into speaking a language it was never meant to learn, and the result is magnificent.
Comments
0 Comments
Join the conversation